

As a teacher and a parent of a busy pre-schooler, finding easy STEM activities is a must.
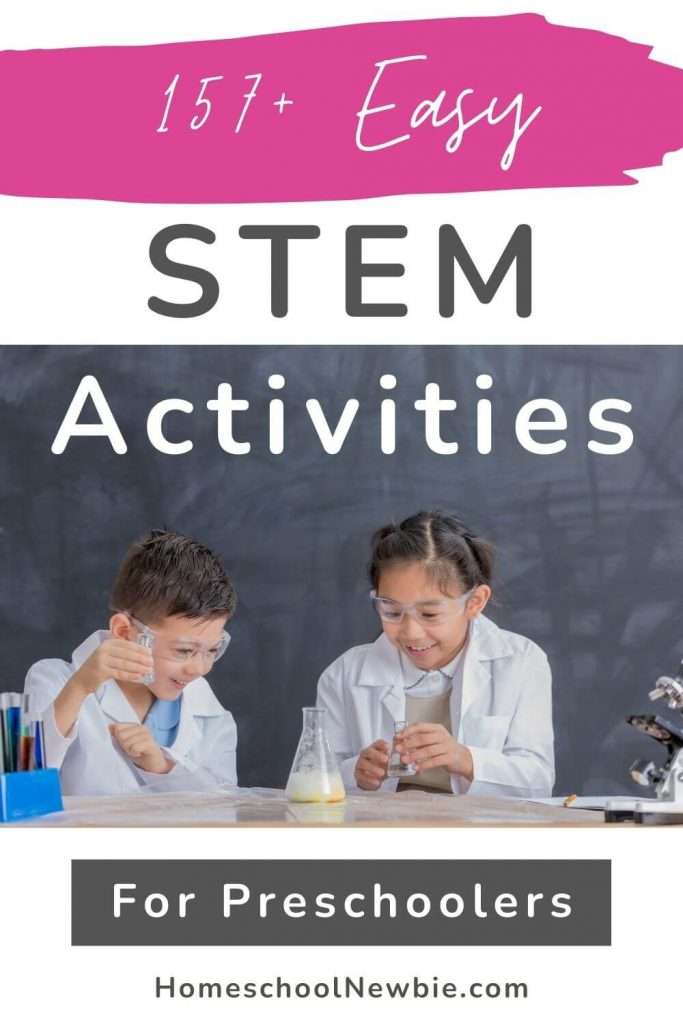
Most STEM activities online lack clear-cut instructions, require a lot of time or cost a lot of money.
I spent several weeks compiling a list of 157+ easy STEM activities that I could try and test with my 3.5-year-old-son. (Watch how excited he gets in the videos below!)
Now, just because I have a 3-year-old doesn’t mean that I wasn’t thinking of parents with older children!
I have a lot of easy STEM activities that will get your school-age children and teens learning too.
You can find the activities organized according to the STEM categories below.
No Prep STEM Activities
Before we dive right into the list, I couldn’t resist starting without mentioning the Lucky Little Learner’s All Access Pass because of its no prep stem activities.
Many of the activities listed below require you to do at least a little bit of prep. However, the STEM activities within the All Access Pass are ready to download and go! This pass includes over 16,000 downloadable resources for many learning topics but it also has many fun science, math, and STEM activities as well!

If you want to check out this resource further, they are having a sale for 20% off right now. Use my affiliate code (which helps to support my small blog – thank you!) with the coupon code: CODE: LLUPP05Z1Y to save 20% and start learning now!
Table Of Contents: STEM Activities
Be sure to do these activities with adult supervision. Not only for safety reasons but also to bond with your children.
What are you waiting for? Dig in below to start learning!
Science
Density Tower Experiment
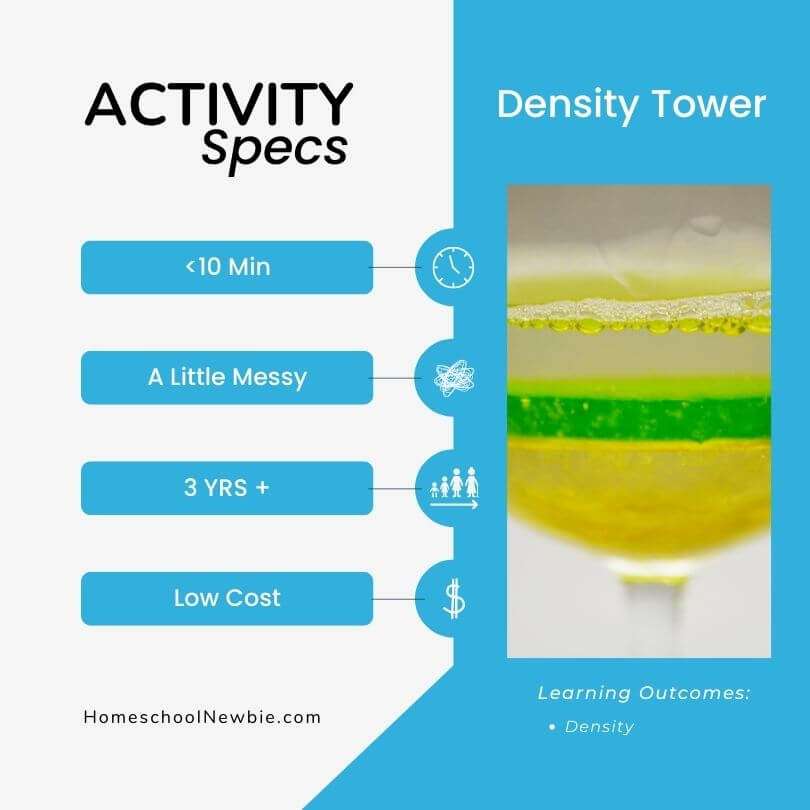
Learning Outcomes:
- Density
Materials:
- ¼ Cup light corn syrup
- ¼ Cup dish soap
- ¼ Cup water
- ¼ Cup vodka or alcohol
- ¼ Cup canola oil
- Pint jar or clear glass cylinder
- Food coloring (optional)
Directions:
- Layer 1: Add ¼ cup of light corn syrup to the jar with yellow food coloring.
- Layer 2: Add ¼ cup of dish soap.
- Layer 3: Mix ¼ cup of water and blue food coloring together then add the water to the jar.
- Layer 4: Add ¼ cup of alcohol with purple food coloring.
- Layer 5: Add ¼ cup of canola oil and red food coloring.
- Tightly screw on the lid to the jar and have fun moving the layers!
@Sick Science!
Expert Tips:
- If you want to adjust the size of the jar, here is a tool to make doubling or dividing this recipe simple.
- To avoid the layers mixing, use a turkey baster and tip the jar lightly on its side when pouring the layers into the jar.
- Do not shake the jar because some of the layers may mix together.
- You can substitute the alcohol with rubbing alcohol. Be sure to change the canola oil layer to go after the water layer and the rubbing alcohol will be the top layer.
Learn more about this experiment at childhood101.com
Find more density experiment ideas at sciencebob.com
Magnetic Painting
Learning Outcomes:
- Magnetic forces
- Color science
- Geometry
Materials:
- Paint
- Cardstock or construction paper
- Tray or cardboard lid
- Magnet
- Small metal objects (bells or screws)
Directions:
- Set a piece of paper on the tray.
- Place the bells on top of the paper.
- Hold the magnet under the tray and try to move the bells using the magnetic pull.
- Place a small amount of paint on the paper.
- Invite your child to use the bell and magnet to paint.
Expert Tips:
- Try using primary colors so your children can see the process of creating secondary colors.
- Challenge your child to find other metal items to paint with.
Learn more about this activity at prekprintablefun.com
Jumping Apple Seeds
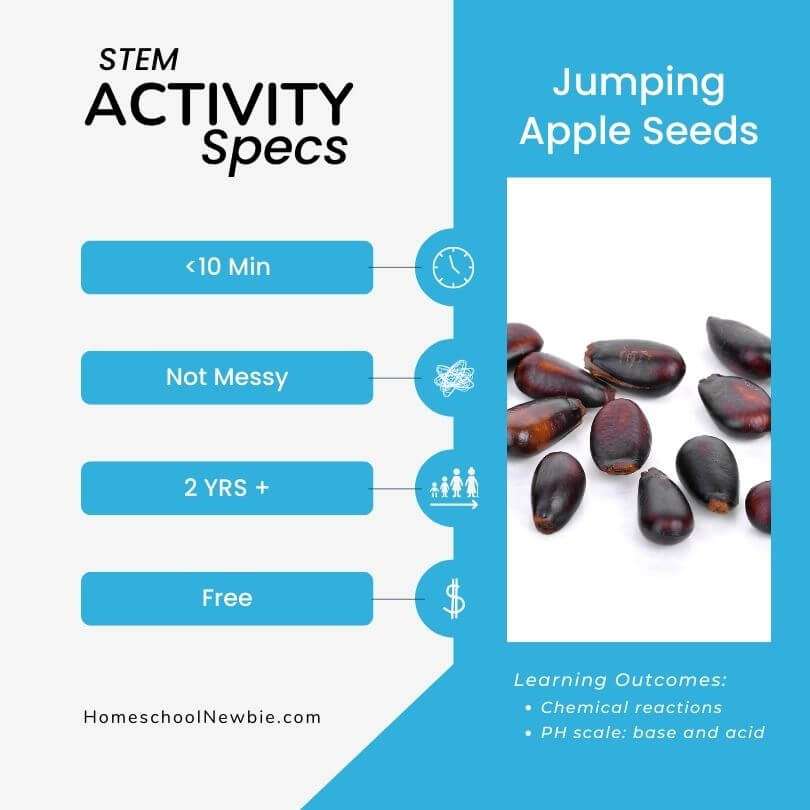
Learning Outcomes:
- Chemical reactions
- PH scale: base and acid
Materials:
- White vinegar
- Plastic cup
- 10 Apple seeds
- 1/4 tsp. Baking soda
- Measuring cups and spoons
- Safety glasses or goggles (Optional)
Directions:
- Add vinegar to cup 1/3 full.
- Add 10 seeds to the cup.
- Add 1/4 tsp. baking soda.
- Watch the seeds start jumping!
Expert Tips:
- The more seeds you add, the easier it will be to see them jump.
- Use other types of seeds if apple seeds aren’t accessible.
Learn more about this activity at jdaniel4smom.com
Create a New Animal Species
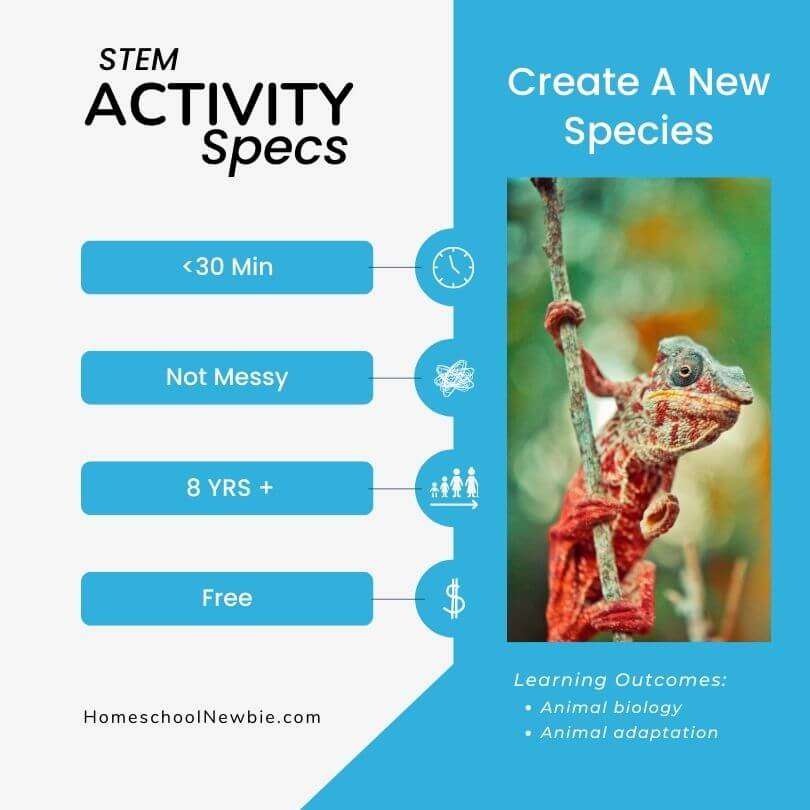
Learning Outcomes:
- Biology
- Needs of living things
- Animal adaptation
- Animal habitats
Materials:
- Paper/pencil
- Crayons or other art supplies
- playdough (optional)
Directions:
- Research several animals’ needs, adaptations, and behavior.
- Use the research to brainstorm features of their new animal species.
- Write down the new animal’s qualities, appearance, behavior, adaptations, needs, etc.
- Then have them draw their animal in their habitat.
- (Optional: Create a 3D model of their animal using playdough.)
Expert Tips:
- Create a stop motion video with their animal in their habitat.
Learn more about this activity at teachingforward.net
Magic Pepper
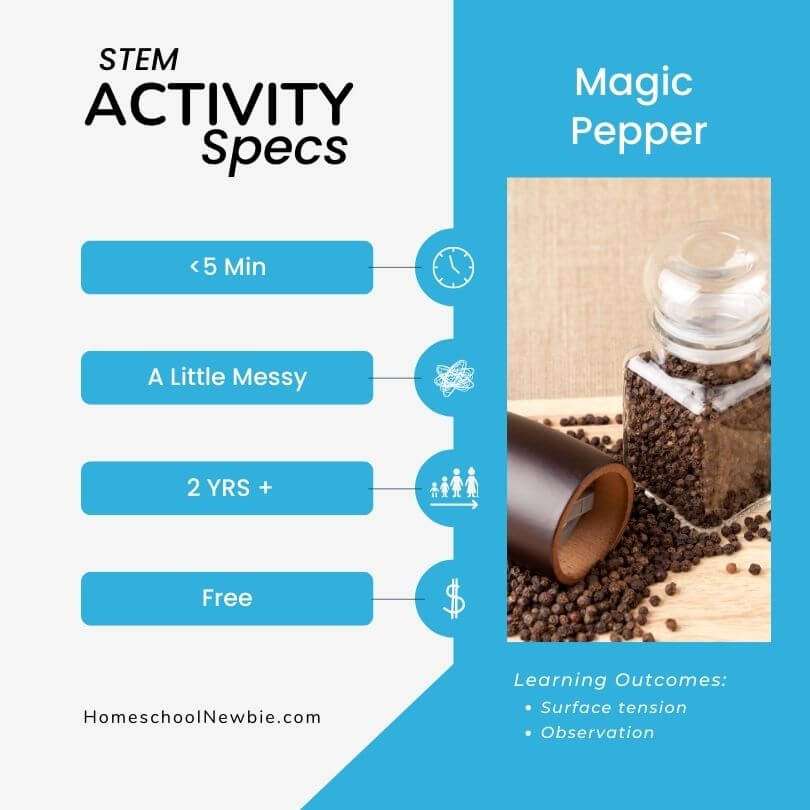
Learning Outcomes:
- Surface tension
Materials:
- Black pepper flakes
- Water
- Dish soap
- Plate
Directions:
- Pour some water on a plate.
- Shake black pepper on the water.
- Dip your finger in dish soap.
- Place your soapy finger in the water.
- Watch the flakes scatter to the edge of the plate!
Expert Tips:
- Try this activity with other types of liquid. Try the milk experiment here! Or other types of flakey substances (sprinkles, cereal crumbs, sparkles).
- Try adding food coloring to the water for added fun.
How Does It Work?
The water bulges a bit like a raindrop on the plate. When the dish soap touches the water, it lowers the surface tension. As the water spreads out, it carries the pepper flakes to the sides of the plate with it.
Learn more about this activity at raisingdragons.com
Underwater Sound Experiment
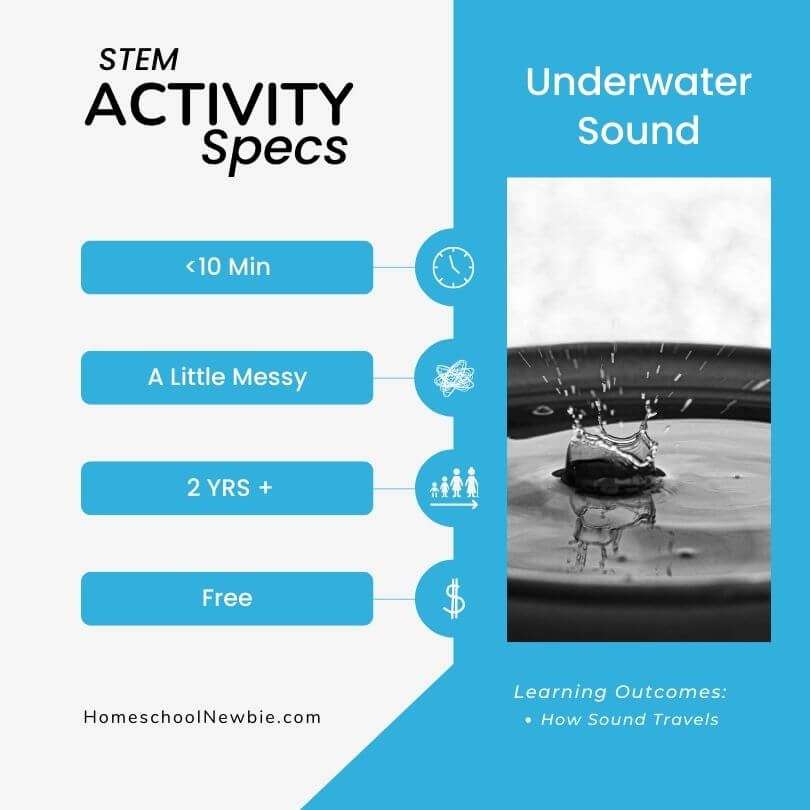
Learning Outcomes:
- How sound travels underwater, through gas, and a solid
Materials:
- Bucket
- Water
- Bottle
- Butter knives
- Solid object (wall, door)
Directions:
- Explain to your child that sound travels through gas, solids, and liquids.
- Show how sound travels through the air (gas) by clapping two butter knives together.
- Ask your child what they would hear when the knives clap together underwater.
- Show this by clapping the two butter knives in a bucket underwater.
- Show how sound can also travel through solids by knocking on a door or wall. Listen from the other side.
Expert Tips:
- Discuss what animals or equipment can hear under the water.
- Clap other objects together to explore different sounds.
Learn more about this activity at stillplayingschool.com
Paint Bag Bombs
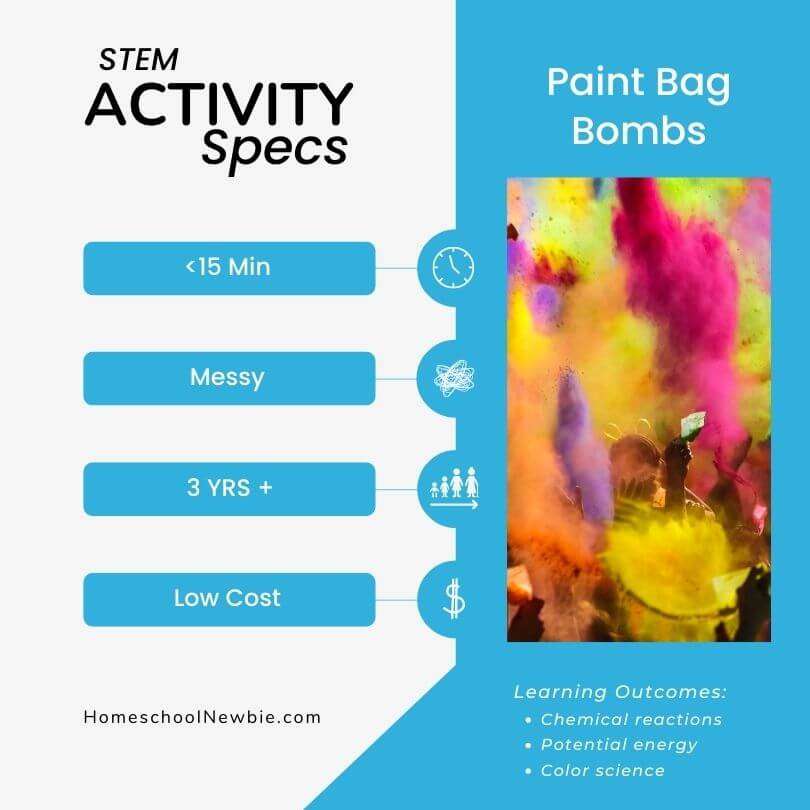
Learning Outcomes:
- Chemical reactions
- Potential energy
- Color science
Materials:
- Zip-seal bags
- Vinegar
- Powder tempera paint or crushed chalk
- Posterboard
- Baking soda
Directions:
- Pour 1/3 cup of vinegar into a sandwich bag.
- Add 2 tablespoons of powder paint or crushed chalk.
- Add 2 tablespoons of baking soda.
- Quickly close the bag then set it on the posterboard.
- The bag will fill with air until it pops!
Expert Tips:
- Seal completely and leave air in the bag when closing.
Learn more about this activity at growingajeweledrose.com
Baking Soda Boats
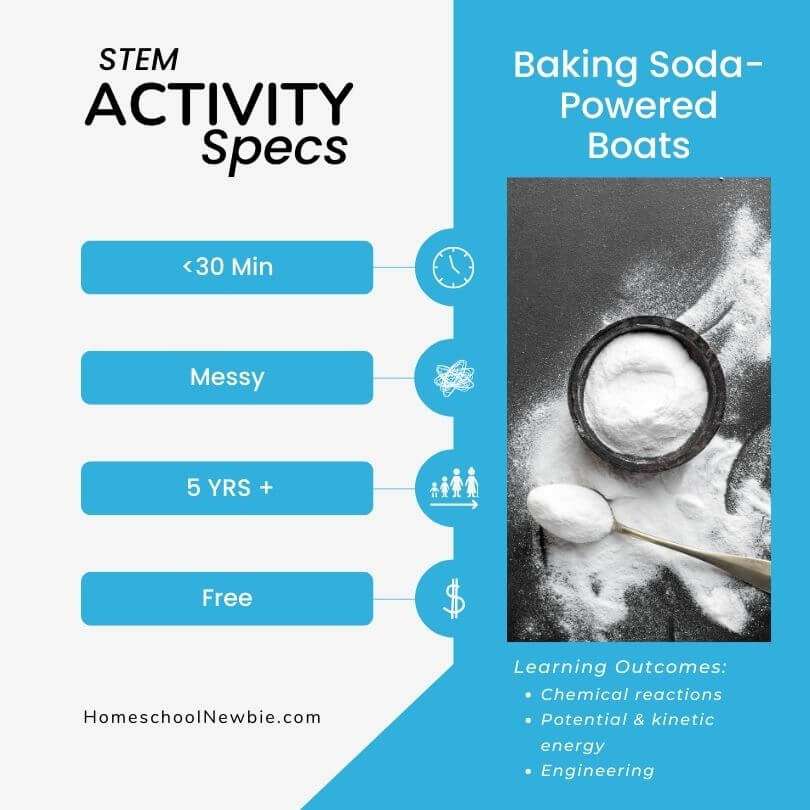
Learning Outcomes:
- Potential energy and kinetic energy
- Force in motion
- Chemical reactions
- Engineering
Materials:
- Empty water bottle – small
- Baking Soda
- Paper towel or tissue
- Scissors
- Straw
- Vinegar
- Tape
- Bath or large container
- Water
Directions:
- Poke a hole in the bottom of the bottle and feed the straw through the hole.
- Trim off excess straw so only about ⅓ of the length remains in the bottle.
- Seal around the straw with tape so no air escapes.
- Add vinegar to the bottle.
- Fold baking soda into a small tissue.
- Quickly add the tissue filled with baking soda into your bottle then seal the bottle.
- Set the boat in the water and watch it move!
Expert Tips:
- If the tape is not sealing the gap around the straw, try using playdough or puddy.
- To extend the activity, brainstorm other ways to move the boat. (Wind, potential energy from a rubber band, etc.)
How Does It Work?
When the acidic vinegar and basic baking soda mix together, they neutralize. This causes a chemical reaction that releases a gas called carbon dioxide. The boat moves forward from the energy of the carbon dioxide produced.
Learn more about this activity at science-sparks.com
Water Whistle Experiment
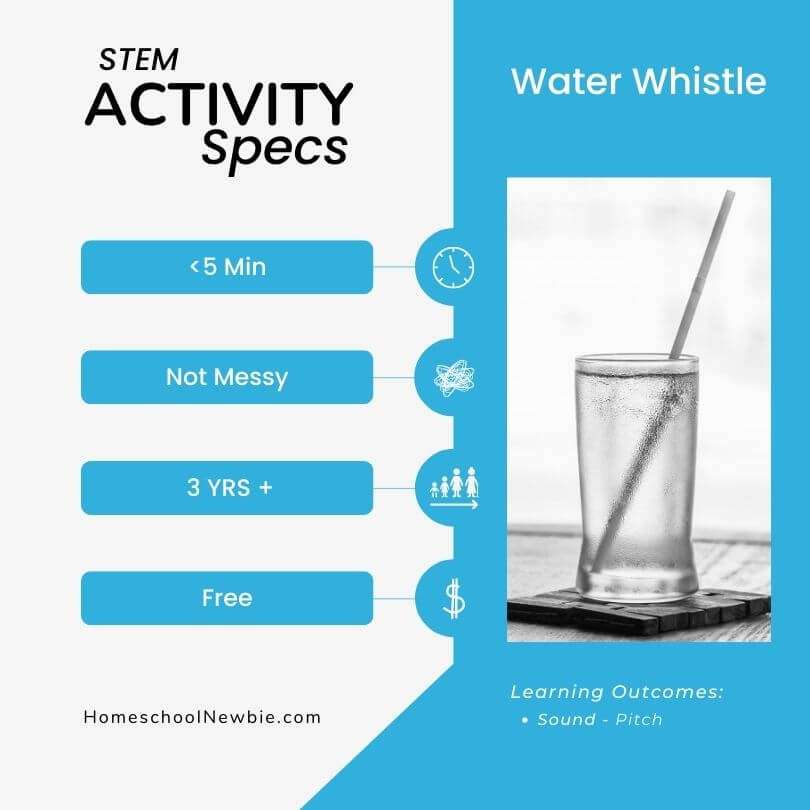
Learning Outcomes:
- Sound
- Pitch
Materials:
- Straws
- Scissors
- Cup of water
- Paper (optional)
- Tape (optional)
Directions:
- Cut a horizontal slit about 2 inches from the top of the straw. Be sure not to cut the straw all the way!
- Bend back the straw where you created the cut to form a right angle.
- Place the longest part of the straw into the water.
- Blow into the straw while maintaining the right angle.
- Listen to the sound as you blow. (May take a few tries)
Expert Tips:
- For extra stability, tape a paper triangle to the straw to secure a right angle in the straw.
- Explore different pitches of sound by adjusting the level of water in the cup.
How Does It Work?
The air inside the straw vibrates and produces a sound that we can hear.
The ratio of water to air will determine the whistle sound’s pitch. If the straw has more water, the sound will be higher. If the straw has less water, the sound will be lower.
Learn more about this activity at mybaba.com
Air Drag and Resistance
Learning Outcomes:
- Gravity
- Air resistance
Materials:
- Rock
- Paper
- A tall place to safely drop objects from
Directions:
- Explain the principles behind the law of gravity and air resistance.
- Drop the paper (spread out wide) and stone at the same time and observe which drops first.
- Crumple the paper into a ball and then drop the stone and paper ball at the same time. Observe which item hits the floor first. (same time)
Expert Tips:
- Try comparing other items to see if there are any differences in the falling times.
Learn more about this activity at adabofgluewilldo.com
Bonus Activity: Air resistance and drag with two cars
Create a Rainbow
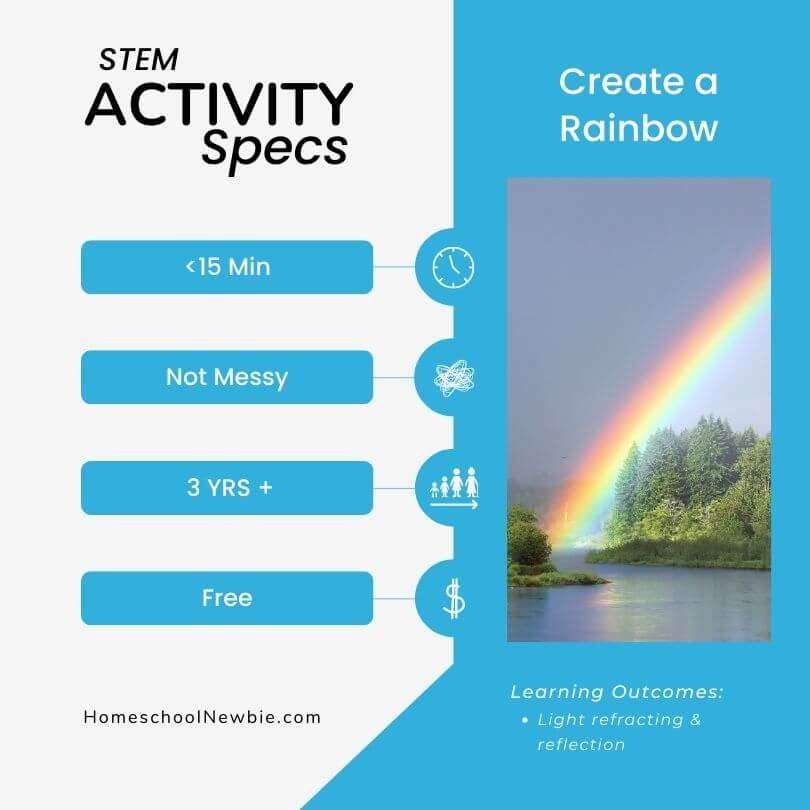
We found this activity in the back of one of my son’s favorite books. Of course, he wanted to make a rainbow of his own so we tried it and had a blast!
It was easy to set up but a little tricky to produce a rainbow at first but we learned a few tricks to pass on to you. We made a few cool rainbows in the end. (See our expert tips section below to make your rainbows easier)
Learning Outcomes:
- Light refracting
- Reflections
- Rainbows
Materials:
- Clear glass or jar
- Water
- A small mirror (makeup mirror, mirror fragment – careful!)
- Flashlight
- Dark room
Directions
- The rainbows were more visible when the wall was close to the jar and light.
- The room needs to be very dark.
- We had the most success with a phone flashlight.
- Experiment with different colored lights, lamps, or sunlight to produce different colored reflections.
- One of our rainbows was a red and white pattern because of the lights in a lamp that we experimented with.
- We moved the mirror around to see many angles and rainbows.
- On the second try, we were also able to see rainbows without the mirror.
How Does It Work?
Rainbows happen when light shines through the water. The light reflects, bends, and splits into seven colors.
We learned about this activity from the book Peppa’s Rainbow.
Find more activities like this one at rookieparenting.com & inspirationlaboratories.com
More Science Activities:
- Magnetic Play
- Jello Earthquakes
- Amusement Park Design
- Soda Bottle Compost
- Disappearing Egg
- Create a Kidney
- Magic Light Bulb Balloon
- Separate Salt & Pepper Static Electricity
- Growing Seeds
- Make Ice Grow
Technology
Alphabet Photo Scavenger Hunt
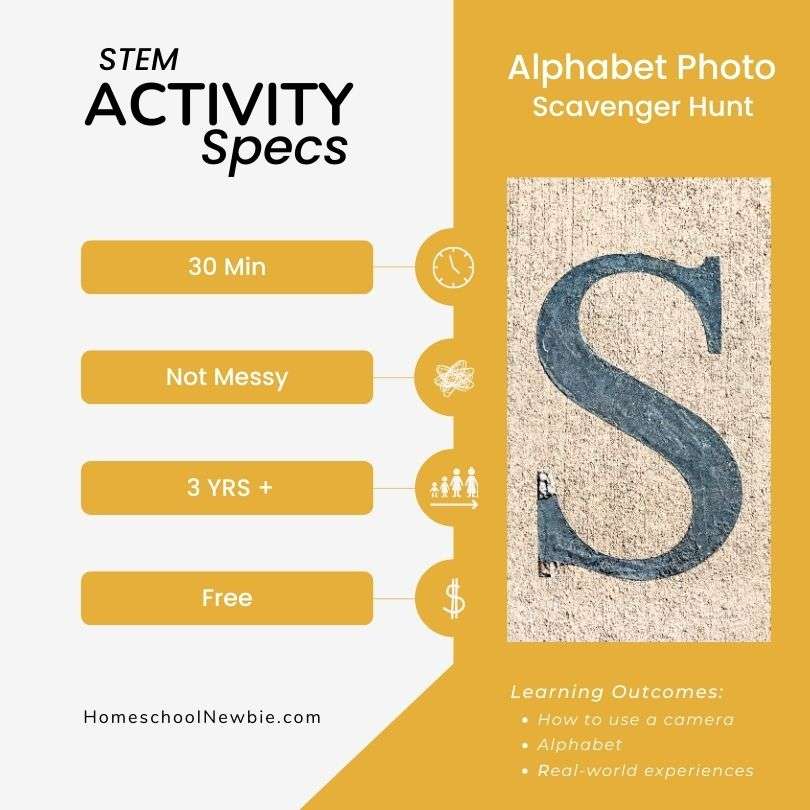
Learning Outcomes:
- Photography
- Alphabet
- Real-world experiences
Materials:
- Phone or camera
- Alphabet checklist (Optional)
Directions:
- Using a camera, take photos of objects shaped like each letter of the alphabet.
- You can hunt for letters around the house, school, town, or outside.
- Check each letter off your list as you photograph them.
- Print them out or create collages online.
Expert Tips:
- Create a collage, write your name, or create an art piece with the photos you took on the hunt.
- Try arranging items into letters such as rocks, buttons, flowers, or fruit.
- Photograph other lesson topics such as shapes, numbers, or life science.
Learn more about this activity at scavenger-hunt.org
Also, try the Zero Digital Photography Challenge
Phone Cup Project

Learning Outcomes:
- How sound travels
Materials:
- Two paper cups
- One 10-foot string
- Small screwdriver, drill bit, or plastic upholstery needle
- Scissors
- Glue
- Markers or decor (optional)
Directions:
- Make a small hole in the bottom of the cups.
- Feed the string through the cups and tie a knot on both ends.
- With the string pulled tight, talk in one cup and listen in the other.
Expert Tips:
- For a clearer sound, pull the string tight and avoid touching objects on the string.
- Try different lengths of string to see if it makes a difference in the quality of sound.
- Instead of cups or string, you can use other materials such as a tin can or wire.
How Does It Work?
Sound can travel through gas, liquid, and solid objects. The sound vibrations from your voice travel from the air in the cup, to the string, and into the air in the other cup. You can whisper into the cup because sound travels well through solid objects (the string).
Learn more about this activity at blog.litttlebrowniebakers.com
Learn more about this activity at letslassothemoon.com
Create Your Own Movie

Learning Outcomes:
- Cinematography/videography
- Creative thinking
- Cooperation
- Storytelling
- Lighting
Materials:
- Paper and Pencil
- A video camera or phone
- Editing software (Free online)
- Props & costumes (Optional)
Directions:
- Brainstorm and write a story.
- Rehearse your lines and the events in the story.
- Film using your phone or camera.
- Edit using a free online tool.
- Watch with friends and family!
Expert Tips:
- Try creating a film around a lesson topic. It could be an event in history, an animal, or a social-emotional skill (empathy or perseverance).
- Try using puppets or other subjects in your film.
Learn more about this activity at oneproductions.com and orlando.momcollective.com
Stop Motion Video
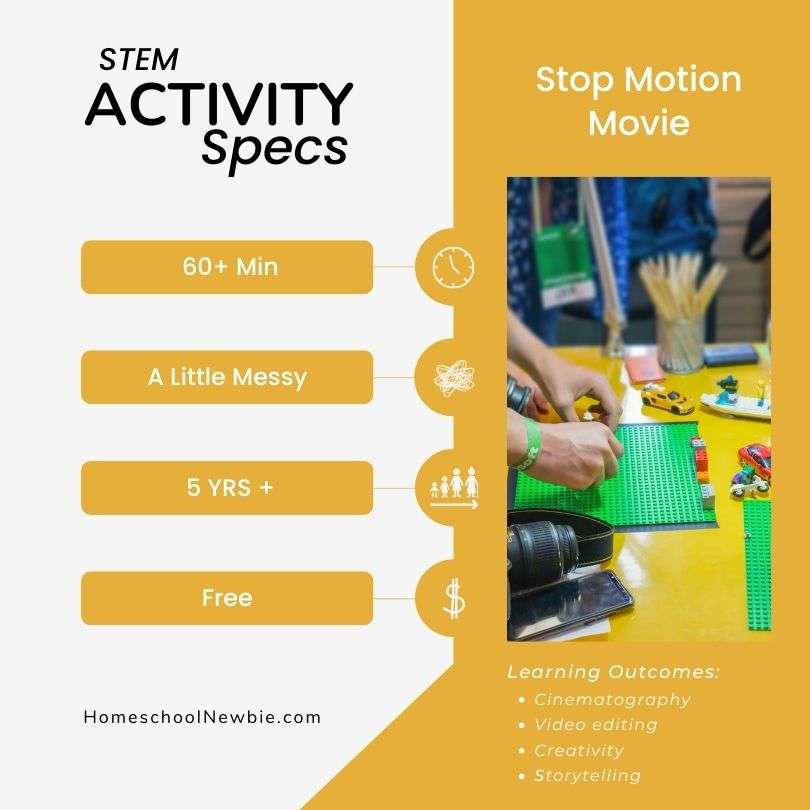
Learning Outcomes:
- Cinematography/videography
- Video editing
- Creativity
- Storytelling
Materials:
- Foldable foam core display board or sheet (for background)
- Smartphone, camera, or tablet
- Small tripod or chair
- Stop Motion Animation App (Optional)
- Collection of objects to animate
- Ideas:
- 3-D Puzzles
- LEGO sets
- Playdough or modeling clay
- Small stuffed animals
- Action figures
- Construction paper
- Ideas:
Directions:
- Choose a location with lots of natural lighting.
- Set up your background to remove visual clutter.
- Set up your scene.
- Set up your camera location.
- Open your stop motion app & check to see if everything is in the frame.
- Set up your subjects and characters in the scene.
- Move the objects a tiny bit then take a picture.
- Repeat until you have completed your story.
- Preview your movie so you can make adjustments.
- Show a friend what you’ve created!
Expert Tips:
- Use a remote to take photos so the camera doesn’t move when you touch it.
- A tripod for your phone or camera is handy but a table or chair will also work.
- Moving each object one picture at a time can take a while. It may speed up the creation process to have a helper.
Learn more about this activity at letslassothemoon.com
Deconstruct a Computer
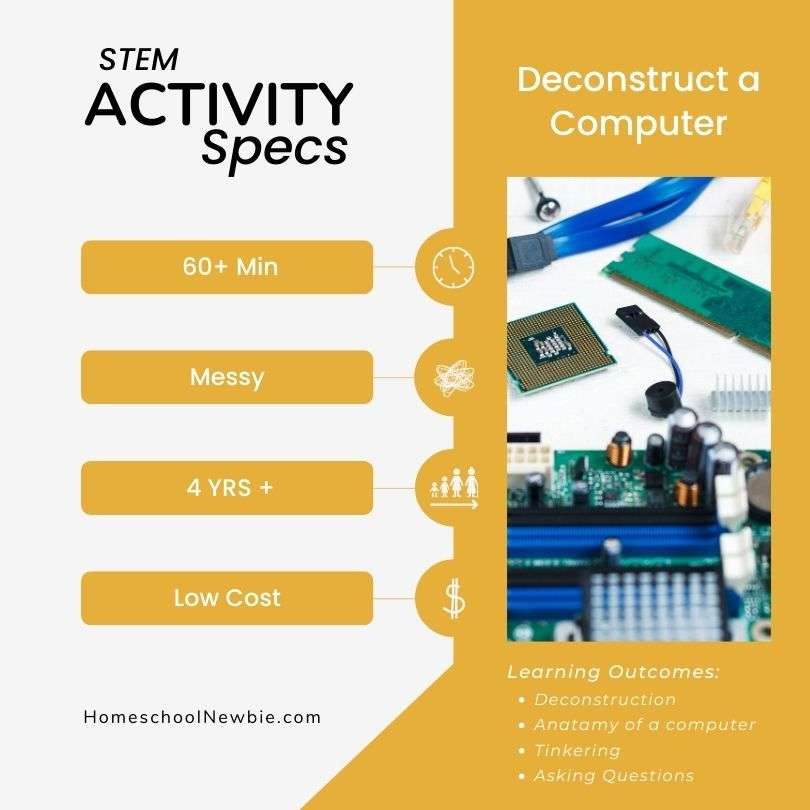
Learning Outcomes:
- Deconstruction
- Anatomy of a computer
- Tinkering
- Asking Questions
Materials:
- Computer tower
- Screwdrivers
- Wire cutters
- Pliers
- Container or bags
- Safety glasses
Directions:
- Explain to your child that they get to take apart a computer.
- Take the computer to a table ready with bowls, trays, and bags to store the small pieces.
- Ask your child questions about what they are discovering as they dig in.
- Use the Electric Component Guide to answer some inevitable “What is this?” questions from your child about the parts they find.
Expert Tips:
- SAFETY: Do not deconstruct CRT monitors. They hold voltage after they’re unplugged. To be sure there is no residual energy, unplug the computer and let it sit for a day or two before doing this project.
- A computer tower is best for exploration when compared to a laptop.
- Save money by finding a computer at the thrift store.
- Use the parts you found in the computer to create a collage or art piece.
- Challenge older children to see if they are able to put it back together!
- You can also deconstruct other items such as a keyboard, T.V., or toaster.
Learn more about this activity at Leftbraincraftbrain.com
Learn Graphic Design With Canva

Learning Outcomes:
- Graphic design
- Problem-solving
- Computer skills
- Artistic creativity
Materials:
- Computer with internet
- Free login to Canva
- (Optional: Printer and paper)
Directions:
- Challenge your child to create a project using Canva.
- Let them explore the tools in Canva or have them watch a video tutorial.
- Once your child has completed a project (ideas below), you can print or share it online.
- Here are some ideas:
- Canva Projects for Kids
- Make a Summer Schedule
- Design a Birthday Invitation
- Create a Science Infographic
- Style a Poster for a Yard Sale
- Whip Up a Recipe Card
- Draft a Comic Book
- Make a Photobook
- Prepare a Fun Resume
- Compose an Activity Worksheet
- Canva Projects for Students
- Create Event Posters
- Make a Resume for a Relevant Character
- Make a Wanted Poster for a Literary Villain
- Make a Diagram
- Do a Climate Change Project
- Make a Cover
- Create a Graph or a Chart
- Back-to-School Get to Know Me
- 20 Ways to Use Canva in the Classroom
- Creating Videos in Canva
- Removing a Background in Canva
- How to Create a Flipgrid Backdrop in Canva
- How to Present a Presentation on Canva and then Share it on Flipgrid
- How to Create Flipgrid Photo Stickers / Media on Canva
- Using Inferencing on Canva
- Student Learning Portfolios on Canva
- Student Created Websites on Canva
- Virtual Science Fair Projects
- Book Bumper Stickers on Canva
- Character Trading Cards on Canva
- Create a Timeline on Canva
- Design Thinking/infographics
- Fake Instagram Character Posts
- Student Created Classroom Badges
- Digital Murals on Canva
- Student Choice Boards on Canva
- Collaborative Comic Strips
- Collaborative Change of Scenery: Change the Setting of a Story
- Drawing on Canva
- Canva Projects for Kids
Expert Tips:
- There are free templates in Canva to help kickstart the process.
- Some of the features on Canva require their paid plan but most are free.
- Use Canva to enhance assignments and lessons.
QR Code Scavenger Hunt

Learning Outcomes:
- Photography
- Computer skills
- Any topic that you teach along with this activity
Materials:
- Phone, tablet, or other devices to scan QR codes
- Printed QR codes (instructions below) OR there are multiple free QR code activities on TPT
Directions:
- Decide whether you want to create your own QR code hunt or use a premade activity.
For Creating Your Own QR Code Scavenger Hunt
- Make a list of questions.
- Use a QR code generator to create a QR code for each question.
- Print them out.
- Place them around the room.
- Instruct your child to use a phone to scan the QR code and answer the questions.
Ideas for Premade QR Code Scavenger Hunts
- Free TPT QR Activities
- Outdoor Treasure Hunt
- Leprechaun Treasure Hunt
- Birthday Day Hunt
- Multiplication Fact Hunt
- Easter Egg Hunt
- Library Scavenger Hunt
- Multi-Step Word Problems Hunt
Expert Tips:
- Use for any topic, party, or event.
- You can also encourage older kids to create their own QR Code scavenger hunt!
Flashlight Constellations
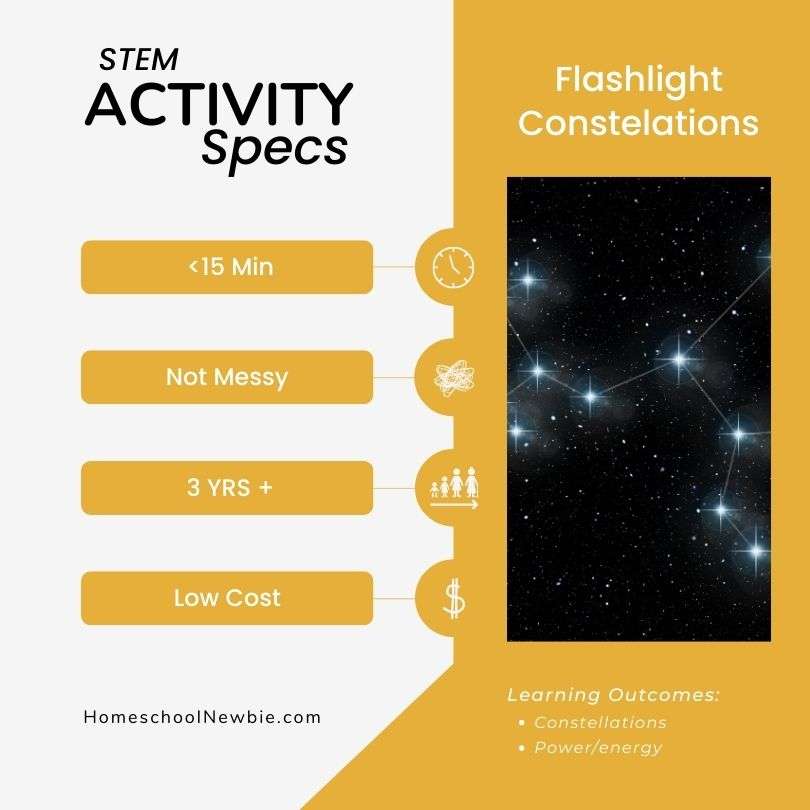
Learning Outcomes:
- Constellations
- Power/energy
Materials:
- Black construction paper
- Scissors
- Pen or pencil
- Flashlight
Directions:
- On black construction paper cut out a circle the size of your flashlight’s lens.
- Draw a constellation onto the circle then punch holes in the dots with a pencil.
- Tape the circle on the flashlight lens.
- Turn on the flashlight and see the constellation!
Expert Tips:
- For better results, use it in a dark room and closer to a wall or ceiling.
Learn more about this activity at playattention.com
Motorized Coloring Machine

Learning Outcomes:
- Engineering
- Design
- Creativity
- Power sources
- Color theory
Materials:
- Toy motor with attached wiring
- 9-volt battery
- 4 thin color markers
- Electric “alligator” clip
- Hot glue sticks and hot glue gun
- Electric drill and screw
- Plastic cup
Directions:
- Tape 4 thin markers to hold up the plastic cup. Similar to table legs.
- Connect the battery pack’s wires to the hobby motor – one wire to each medal hole.
- Secure the battery on the top of the cup using tape.
- Add tape to the hobby motor’s knob and test to see if it is secure.
- (Optional: decorate to look like a robot.)
- Place the motorized drawing machine on a poster with the lids of the markers off.
- Turn on your motor and watch it start to draw!
Expert Tips:
- Try decorating and naming your robot.
- Hang your artwork when finished.
Learn more about this activity at kiwico.com
Learn to Code
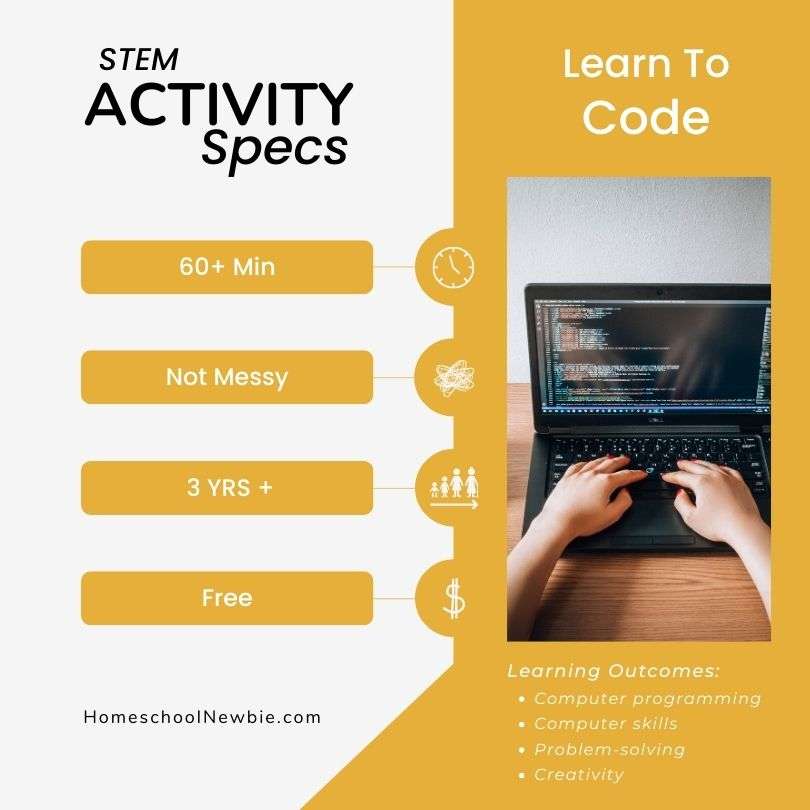
Learning Outcomes:
- Computer programming
- Computer skills
- Problem-solving
- Creativity
Materials:
- Computer
Directions:
The resources available online allow kids of all ages the ability to learn to code. Some programs advertise ages as early as 3 years old!
Ideas of free and low-cost options to get you started:
- Outschool.com – ($20 credit code: jKENt7Gj )
- Hour of Code – Khan Academy
- Scratchjr Projects for Kids
- CodeCombat
- Lightbot.com
- Crunchzilla.com
- Blockly.games
- Stencyl.com
Expert Tips:
- Start small, keep it fun, and try something correlated with the interest of your child.
More Technology Activities:
- Learn STEM with Outschool classes ( $20 credit code: jKENt7Gj )
- Play games over video calls
- Coin battery activities for kids
- Tiny dancers with a homopolar motor
- Build a website using Google Sites
- Use Squishy Circuits
- Energy-efficient window
- Screen-free coding ideas
- No screen superhero computer game
- Pirate map navigation
Engineering
Balloon Car
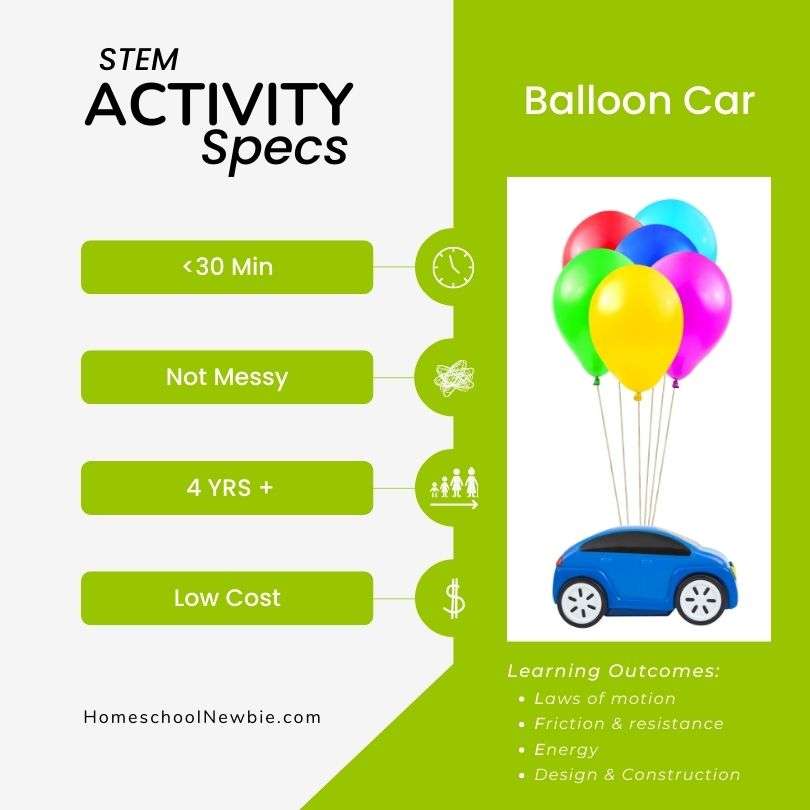
Learning Outcomes:
- Laws of motion
- Friction & resistance
- Conservation of energy
- Physics
- Kinetic energy
- Potential energy
Materials:
- Plastic bottle
- Four plastic bottle caps
- Wooden skewer
- Two straws
- Balloon
- Tape
- Scissors or a sharp knife
Directions:
- Cut a straw into two equal pieces.
- To form the axles, tape the straw pieces to the bottom of the front and back of your bottle parallel to each other.
- Cut a wooden skewer into two even pieces then slide them through the straws on your bottle.
- To form the wheels of the car, cut a + shape on each lid and place the lids on the skewers.
- Tightly secure the neck of the balloon over the end of the second straw with tape.
- Poke a tiny hole in the top of the bottle so you can squeeze the other end of the straw through and out the mouth of the bottle.
- Tape the straw to the bottle so it stays in place then blow through the straw to inflate the balloon.
- When ready, let the car go!
Expert Tips:
- If your car isn’t moving properly, check the security of the tape and alignment of your wheels and axle.
Learn more about this activity at scientificamerican.com.
Here are some other balloon car activities:
Lego Balloon Cars:
Toilet Paper Roll:
Wood Race Car:
Cardboard and Lids:
Straw and Popsicle Stick:
Balloon Rocket
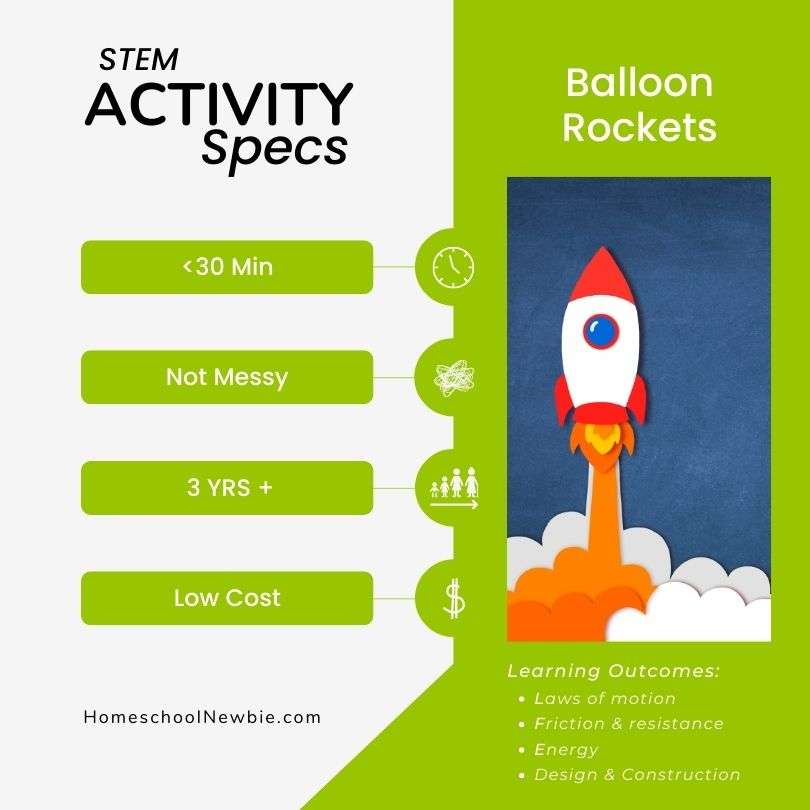
Learning Outcomes:
- Forces
- Motion
Materials:
- Balloon
- String
- Tape
- Drinking straw
- 2 Chairs
Directions:
- Tape string to two objects, such as chairs, about 10 feet away from each other.
- Cut off the bending part of your straw then slide the string through the straight straw piece.
- Inflate the balloon and tape it to the straw.
- Let the balloon go and watch it launch!
Expert Tips:
- Race a friend by tying two strings next to each other and launching two balloons.
Learn more about this activity at coolscienceexperimentshq.com
Marble Runs
Learning Outcomes:
- Gravity
- Motion
- Velocity
Materials:
- Cardboard, pegboard, wood
- Marbles
- Decorations (optional)
- Materials to build the marble course:
- Ideas…
- Cups
- Popsicle sticks
- Toilet rolls, paper towel rolls, or wrapping paper rolls
- Paper plates
- Pool noodles
- Glue, tape
- Ideas…
Directions:
- Provide various materials for your children.
- Instruct them to design and create a marble run.
- Set challenges such as length, speed, or target to reach.
- Provide your child with examples of other marble runs to inspire their design. (ideas below)
- Design your run on paper then begin building!
Expert Tips:
You can make it more challenging for your children by giving them quests such as…
- A length requirement
- A destination goal
- Speed: fastest or slowest
- Race against each other’s run
- A time limit for building their course
Activity ideas to inspire your project:
- Pool noodle marble run
- Water slide marble run
- Pegboard marble run
- Cardboard maze run
- Marble run with an inclined plane
- Lego marble run
- Lego duplo marble run challenge
- Wooden train tracks marble run
- Paper plate marble run
- Paper towel roll marble run
- Magnetic marble run
- 25-second marble run challenge
- Popsicle stick marble run
Popsicle Stick Catapult
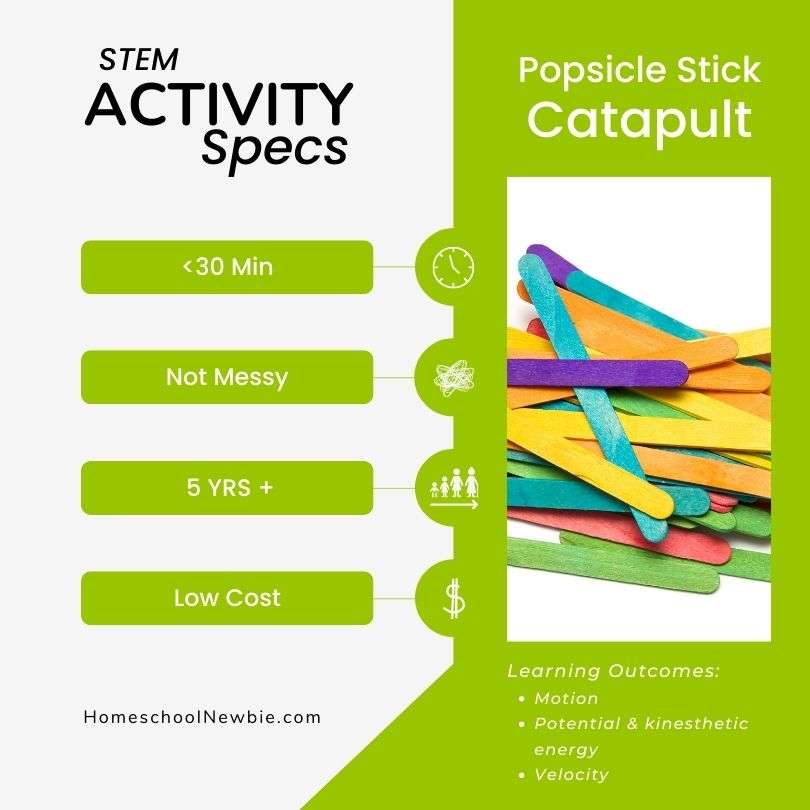
Learning Outcomes:
- Motion
- Potential energy
- Velocity
Materials:
- 10 Popsicle sticks
- Plastic spoon
- 3 Rubber bands
Directions:
- Wrap a rubber band around one end of a stack of 9 popsicle sticks.
- Slide another popsicle stick just before the bottom stick in the stack, forming a + shape.
- Wrap the rubber band around the other end of the sack.
- Attach the handle part of a spoon to one end of the single popsicle stick.
- Pull back on the large part of the spoon and launch!
Expert Tips:
- Build a cup tower and knock it down with your catapult.
Learn more about this activity and more ideas at shelterness.com
Air Vortex Cannon
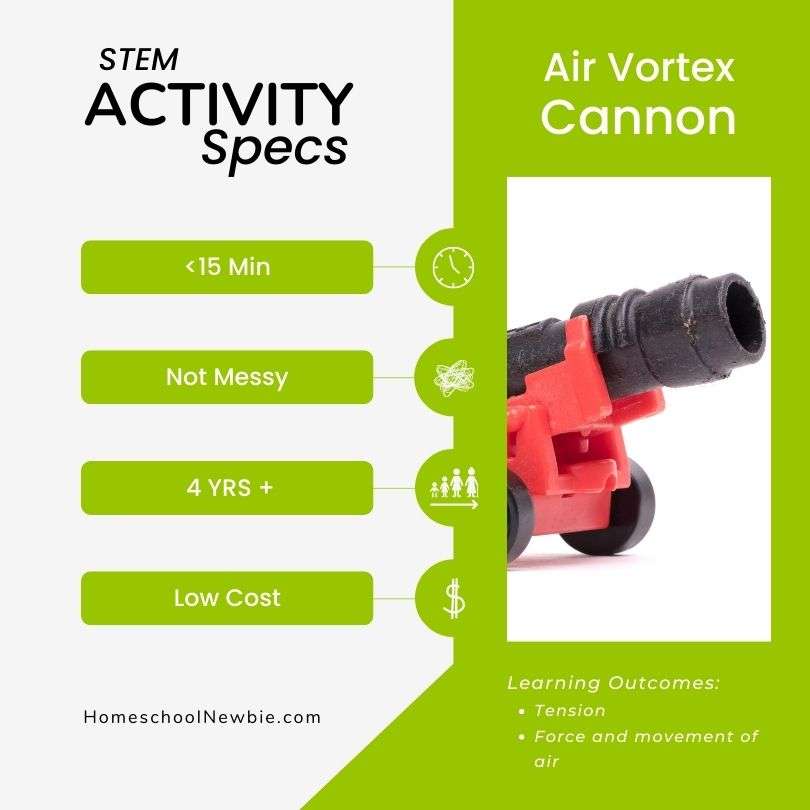
Learning Outcomes:
- Tension
- Force
- Movement of air
Materials:
- Bottle
- Balloon
- Scissors
- Tape
- Decor (Optional)
Directions:
- Cut off the bottom end of a water bottle.
- Cut off the top of the balloon.
- Attach the bottom of the balloon to the water bottle.
- Secure the balloon with tape.
- Pull back on the balloon and launch some air!
Expert Tips:
- Try knocking down a domino line.
- Race a friend to see who can push a pom pom ball through a maze with their cannons the fastest.
Learn more about this activity at littlebinsforlittlehands.com
Build a Kite
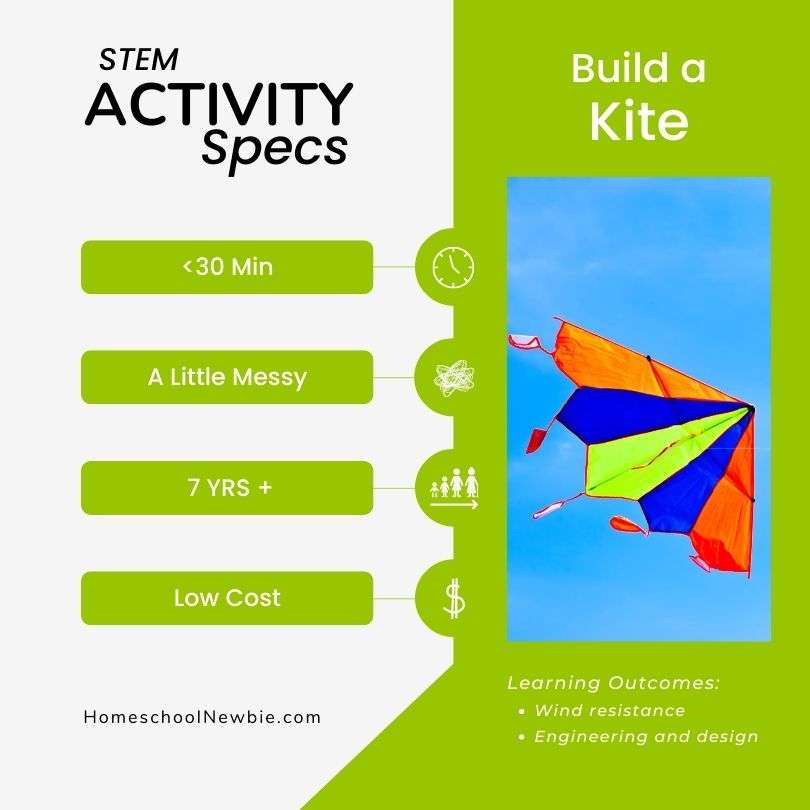
Learning Outcomes:
- Wind resistance
- Engineering and design
Materials:
- Drinking straws, or wooden skewers
- Light-weight material (paper, fabric, tissue paper)
- String
- Scissors
- Ribbon
- Glue or tape
- Ruler
Directions:
For Older Children: Independent Challenge
- Challenge your children to use the materials above to create their own kites.
- Test their designs and make adjustments.
For Younger Children: Build together
- Build and fly a kite with an adult! Here is an idea you can try.
Expert Tips:
- Try it on a windy day and teach about the weather.
Penny Raft
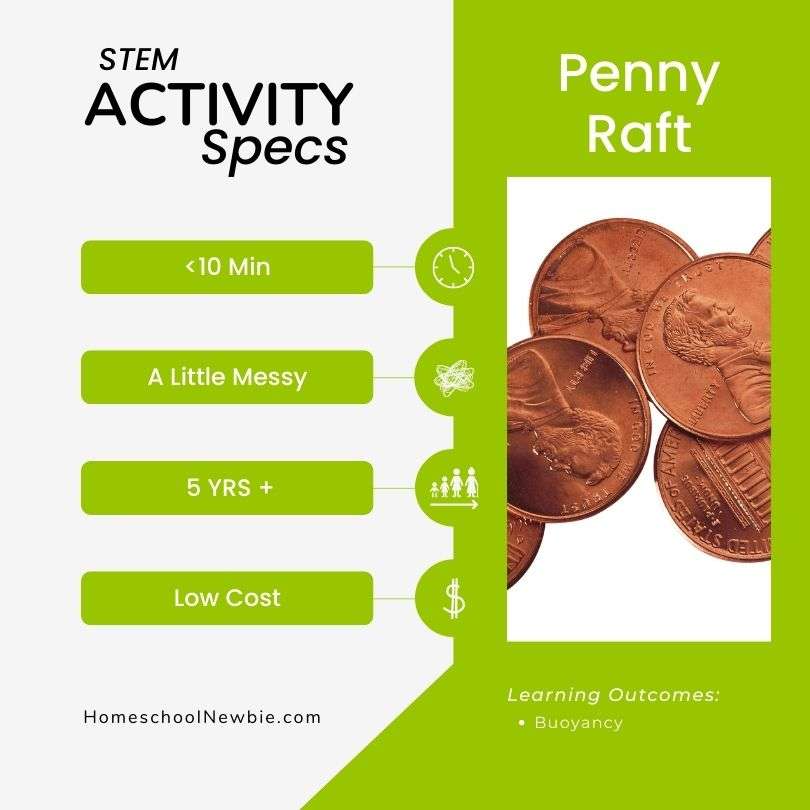
Learning Outcomes:
- Buoyancy
Materials:
- 6 straws
- Aluminum foil
- 8 Inches of masking tape
- Small tub or bucket
- Pennies
Directions:
- Challenge your child to construct a boat that will be able to hold pennies.
- Provide them with the materials above.
- Set a time limit and begin construction.
- Test design and adjust if needed.
Expert Tips:
- Ask your child what will happen if you close the pennies in the foil. Test their theory then talk about the science behind buoyancy.
Learn more about this activity at sciencedemoguy.com
Pool Noodle Pom Pom Shooter
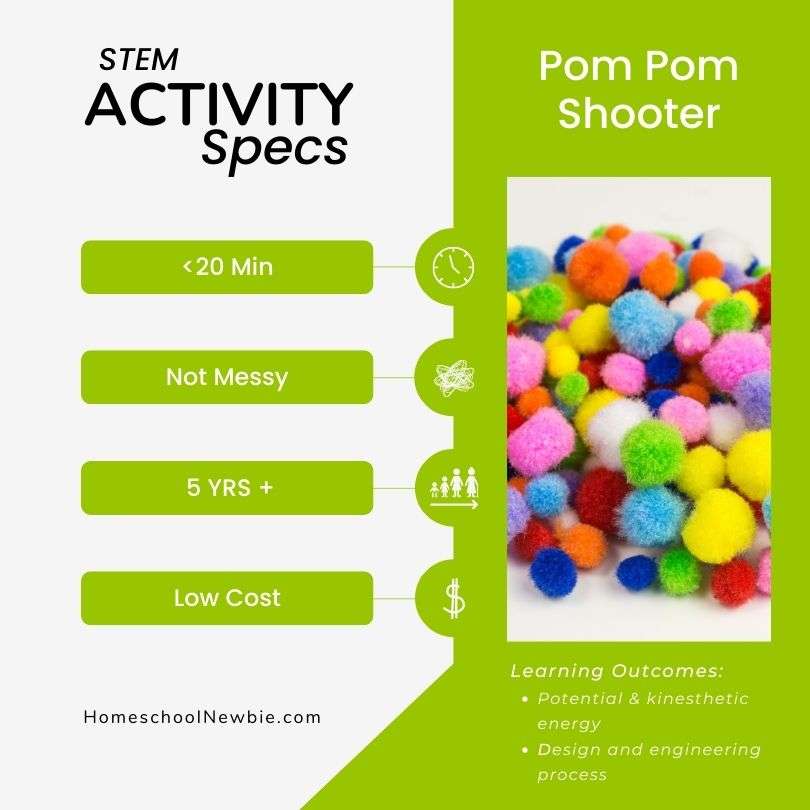
Learning Outcomes:
- Potential and kinetic energy
- Design and engineering process
Materials:
- Balloons
- Pom poms
- Pool noodle
- Tape
Directions:
- Tie a knot on the neck of your balloon.
- Cut and discard the bottom of the balloon.
- Cut the pool noodle into two-inch pieces.
- Cover the end of the pool noodle with the balloon and secure it with tape.
- Put a pom pom ball in the open end of the noodle
- Pull back on the balloon.
- Let it go to launch the pom pom!
Expert Tips:
- Fill the pool noodle with many pom poms to launch a blast of them at once!
- Play games with your pool noodle shooters:
- Compete to shoot the furthest with friends.
- Play tag
- Play catch by shooting the pom poms in the air and catching them before they touch the floor.
Learn more about this activity at hellowonderful.co
Build a Mini Golf Course
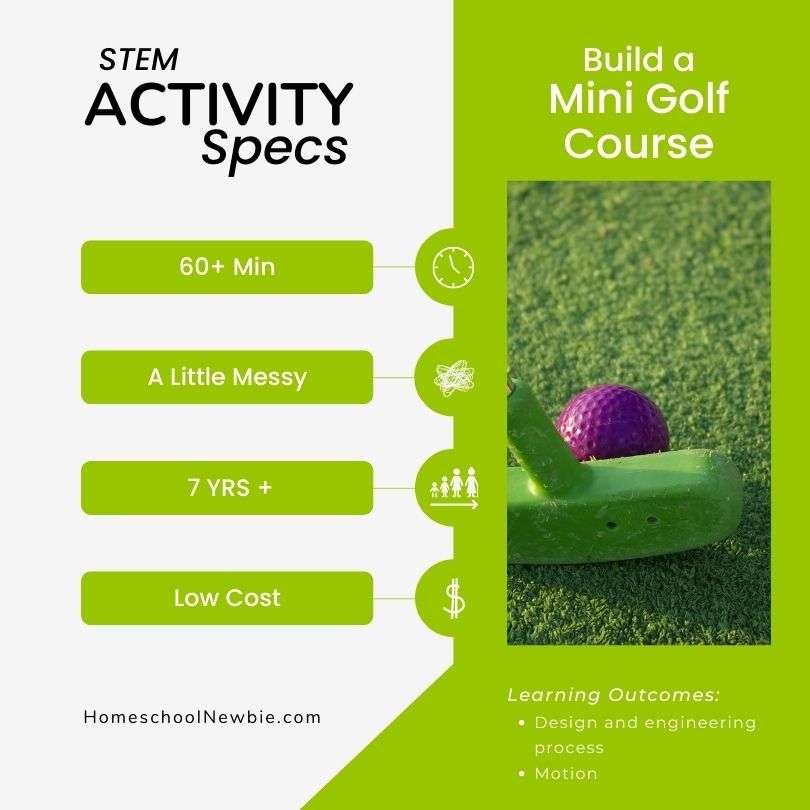
Learning Outcomes:
- Design and engineering process
Materials:
- Recyclables
- Household items
- Natural materials
- Flags
- Golf ball
- Paper (for labeling the holes)
- Marker
Directions:
- Challenge your child to create a mini golf course.
- Design a course with paper and pencil.
- Gather materials from outside, around the house, or leftover craft projects.
- Build using the design as a reference
- Test out your course to see if there is anything that needs adjustments.
- Adjust the course where needed.
- Play! Invite family and friends to try out the course with you.
Expert Tips:
- Challenge your child further by adding requirements for the course:
- A certain number of holes to complete.
- Specific types of obstacles in the course (sandpit, hills, tunnels, moving parts, buildings, etc.)
- Here is another idea to help you get started. Try this LEGO mini golf course
Learn more about this activity at ehow.com
Build a Trampoline
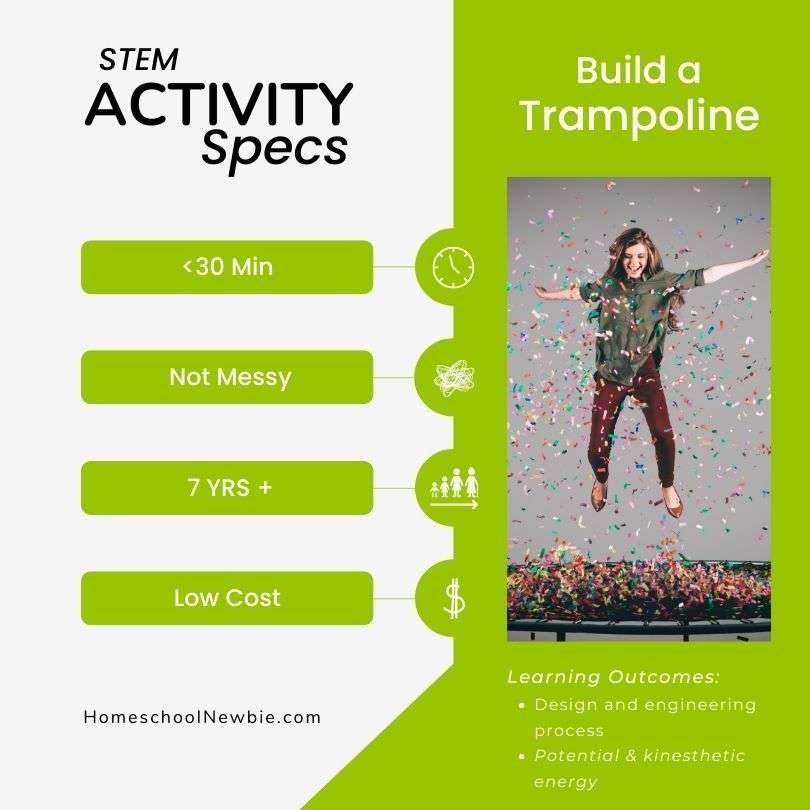
Learning Outcomes:
- Potential energy and kinetic energy
- Tension
- Design and engineering process
Materials:
- Rubber bands
- Disposable bowl
- Hole punch
- Felt
- Toothpicks (Cut in half)
- Rocks
Directions:
For the Trampoline mat:
- Cut a circle out of the felt the same size as the bowl mouth.
For the Springs:
- Punch out holes along the rim of the plastic bowl.
- Loop a toothpick through the end of a rubberband then slide it through a hole in the bowl. The toothpick acts as an anchor so the rubber band doesn’t slide through the hole.
- Stretch the rubber band to the opposite side of the bowl then anchor it with another toothpick.
- Repeat the steps above until all the rubber bands are anchored in the holes.
Putting it all together
- Weigh down the bowl by placing rocks in the bottom.
- Place the felt circle on top of the rubber bands.
- Start bouncing! Try bouncing objects small enough to fit on the tramp.
Expert Tips:
- If your trampoline doesn’t have enough tension, try using smaller rubber bands.
Learn more about this activity at jdaniel4smom.com
More Engineering Activities:
- Water bottle fountain
- Zipline challenge
- Renewable water energy
- Build a Hexbug maze
- Paintbrush challenge
- Stick tracks
- Easter egg stacking
- Build the Eiffel tower
- The solo cup engineering challenge
- Peeps parachute
Math
Explore Nonstandard Measurement
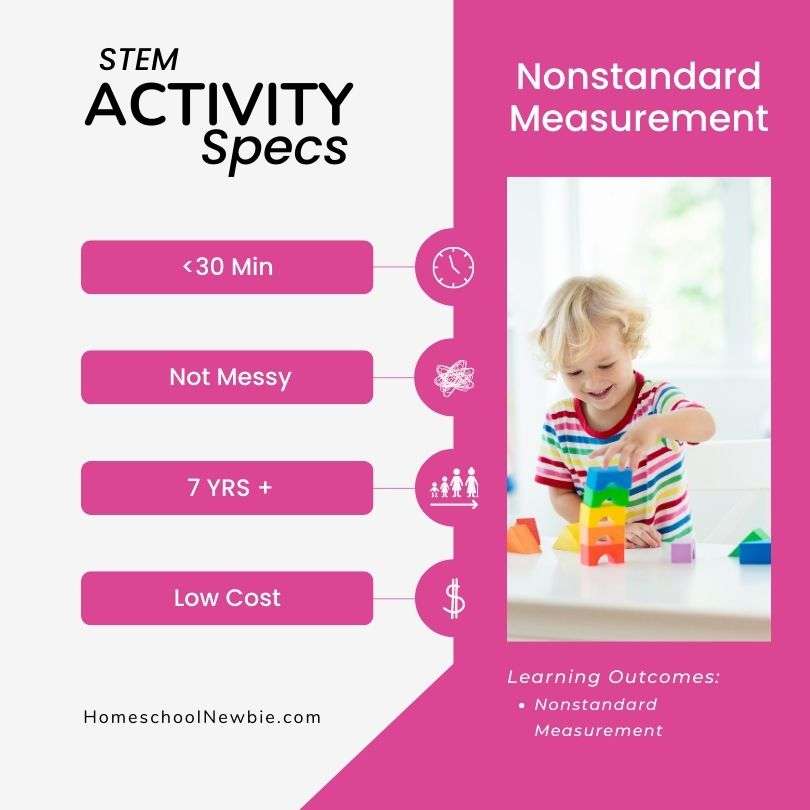
Learning Outcomes:
- Nonstandard Measurement
Materials:
- Various materials to measure with (ideas below)
- Worksheet and pencil to record measurements
Directions:
- Challenge your child to measure an object using various items from around the house.
- Give your child some materials such as paper clips.
- Ask them to measure an object such as a shoe using the paperclips.
- Write down the measurements and compare the results with other items.
Ideas for nonstandard measurement:
Geometrocity
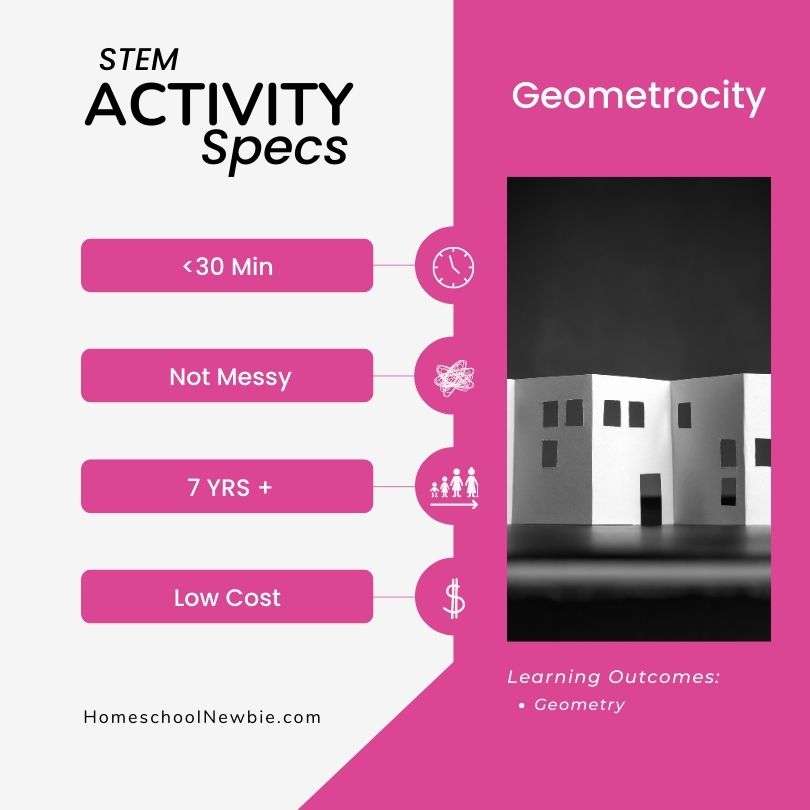
Learning Outcomes:
- Geometry
Materials:
- Large graphing paper (or copy paper)
- Scissors
- Tape/glue
- Crayons
Directions:
- Cut and decorate 3D shapes for buildings (Find 3D patterns here.)
- Fold and tape the shapes to form the buildings.
- Attach the buildings to posterboard or more graphing paper.
- Draw roads and other elements in the city.
Expert Tips:
- It is easier with graphing paper but you could get away with using regular copy paper.
- My 3rd-grade class had a lot of fun using this printable. You might want to give it a try to save some time.
- Create different types of city buildings. (hospital, library, police station, grocery store)
- Explore other 3D shapes. (cones, cylinders, pyramid)
Learn more about this activity at Digitaldivideandconquer.blogspot.com or Teachbesideme.com
Geometry Puzzle Challenge
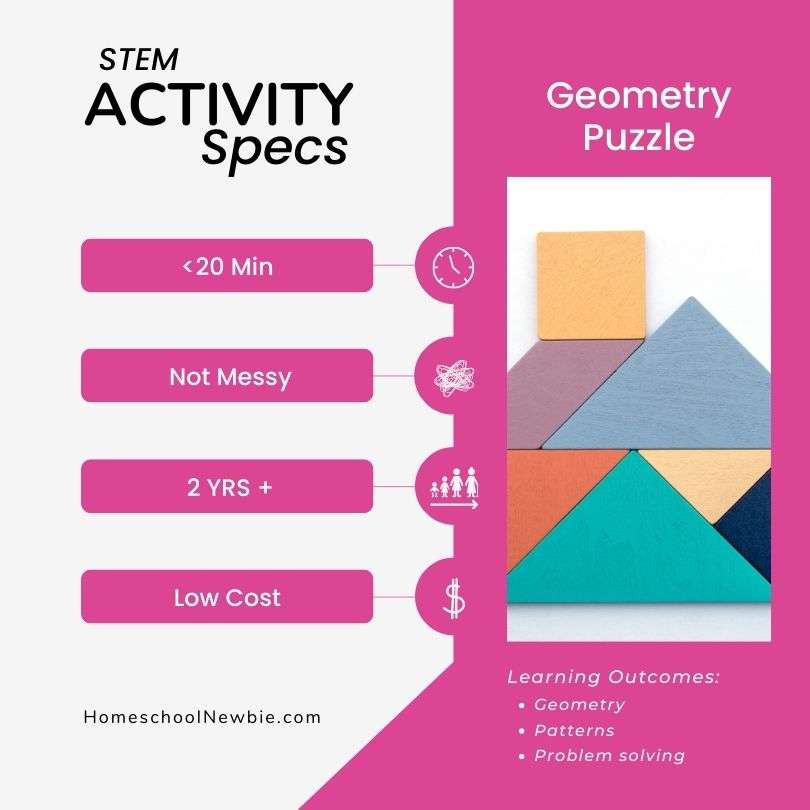
Learning Outcomes:
- Geometry
- Patterns
- Problem-solving
Materials:
- Pattern blocks
- Cardstock
- Markers
- Laminator or a sheet protector (Optional)
Directions:
- Prep: create an image using the blocks and trace the individual blocks with a marker and paper. Then set the blocks aside. Here is a library of free templates.
- Play: With the blocks, invite your child to recreate the shape using the traced outline as a guide.
Expert Tips:
- You can make it more challenging with larger pictures or without as many guiding inside lines.
Learn more about this activity at Sugarspiceandglitter.com
Represent Fractions Challenge
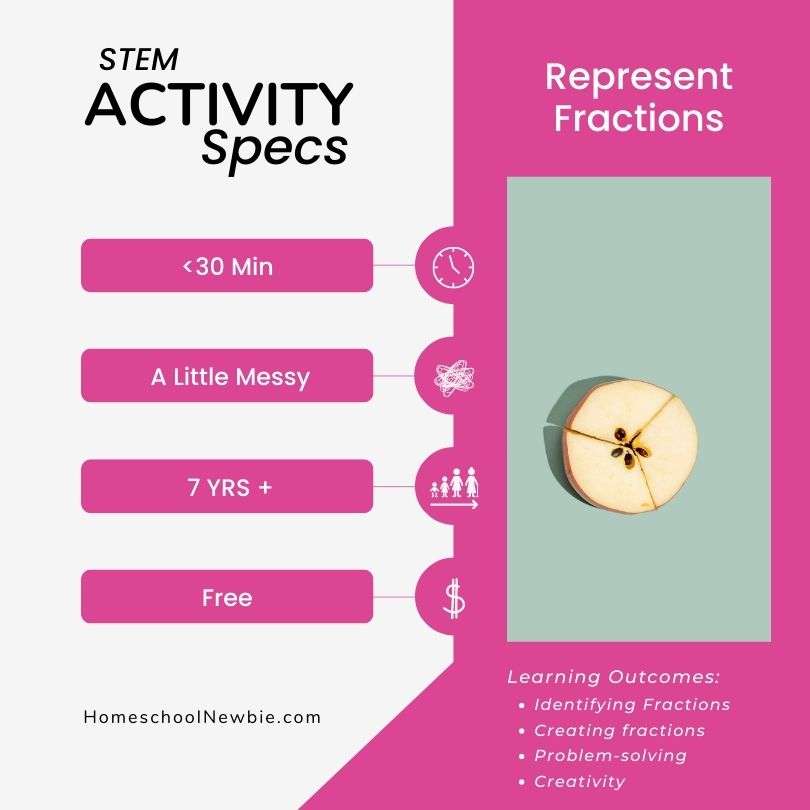
Learning Outcomes:
- Identifying fractions
- Creating fractions
- Problem-solving
- Creativity
Materials:
- Anything you can separate into sections (ideas below)
Directions:
- Review fractions together using various materials. (ideas below)
- Using the chosen item, have your child represent one whole, one half, 1/3, 1/4, 1/5…1/12
- Then have them represent fractions such as 2/3, 3/3, etc.
- Invite your child to record the fractions they represent on paper.
Expert Tips:
- For younger children, provide a few examples of this before you set them free to create their own.
- Some popular things to represent fractions are candy bars or pizza. Almost anything that can separate can represent fractions.
Ideas for Representing fractions:
- Sticks
- Cookies
- Oreos
- Fraction Trees
- Crafts
- Pizza
- Graham crackers
- Candy bars
- Pie
- Cake
- Brownies
- Sandwiches
- Paper
- A drawing
- Measuring cups or spoons
- Puzzles
- Shapes
- Beads
Water Ball Math Toss
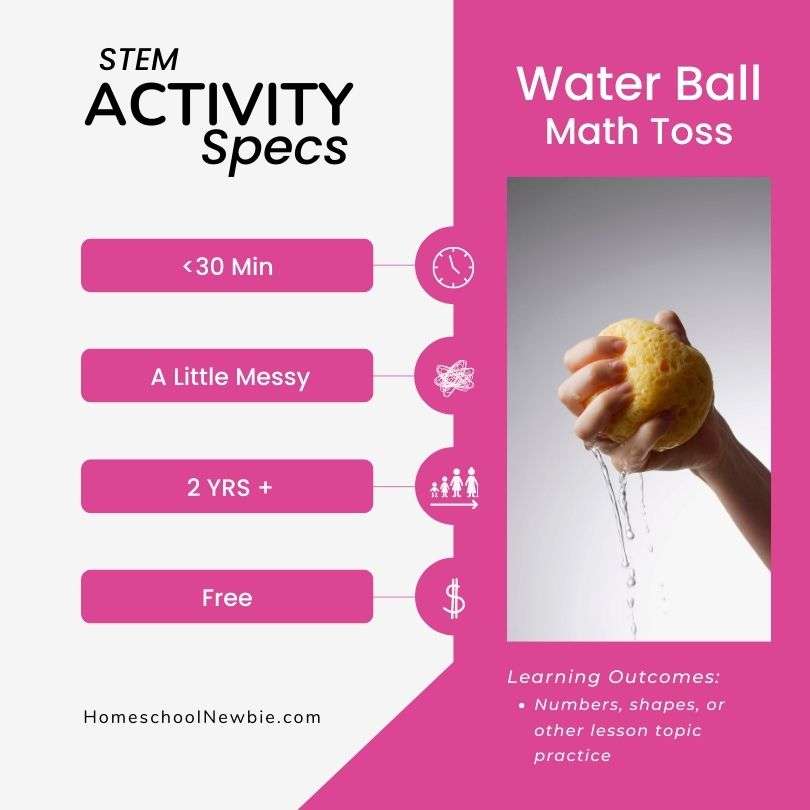
Learning Outcomes:
- Number recognition
- Option to adapt to other learning topics:
- Addition
- Multiplication
- Division
Materials:
- Sidewalk chalk
- Water ball or large sponge
- Mop bucket
- Water
Directions:
- Begin by writing numbers on your sidewalk or driveway.
- Fill a bucket with water and add the water balls.
- Call out a number and have your child try to throw the ball on the corresponding number.
Expert Tips:
- Try having your child throw the ball first, then say the number they land closest to.
- You can choose different lesson topics to practice. (sight words, shapes, simple math problems)
Learn more about this activity at easttnfamilyfun.com
Sidewalk Chalk Grid Art
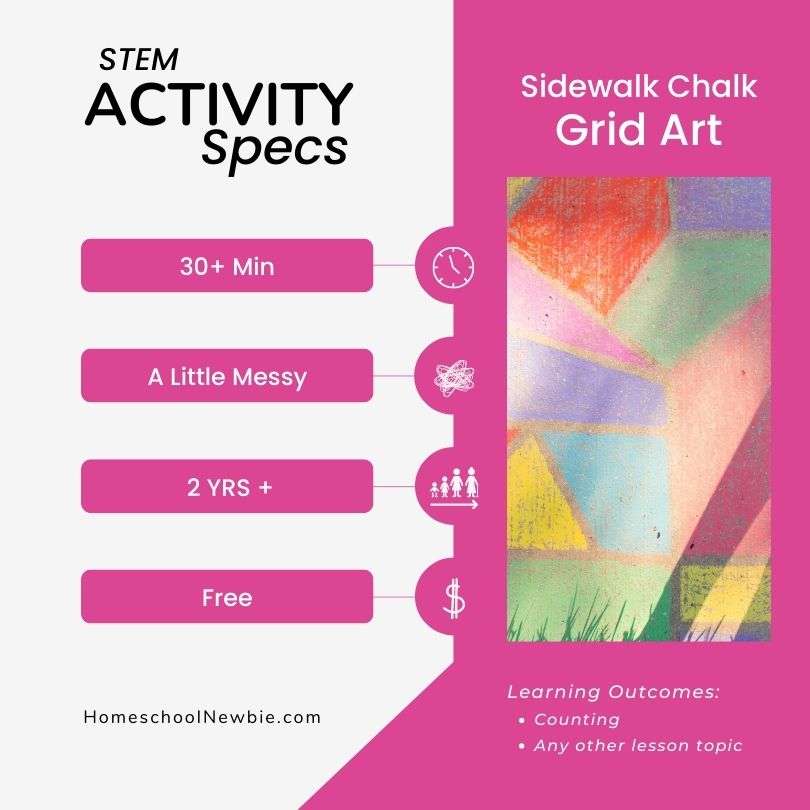
Learning Outcomes:
- Graphing
- Ratios: Using grids to increase the scale of a photo
Materials:
- Chalk
- Photo
- Pencil or pen
Directions:
- Print a small photo and draw a square grid on it. Use 1-inch squares for the grid.
- Draw a larger grid on your driveway with the chalk. Be sure to use the same number of squares as you drew on your photo.
- Draw the photo on your driveway while referencing the photo one square at a time.
Expert Tips:
- Use a simple design for an easier project and a more detailed photograph for a challenge.
Learn more about this activity at Theeducatorsspinonit.com
Math Mazes
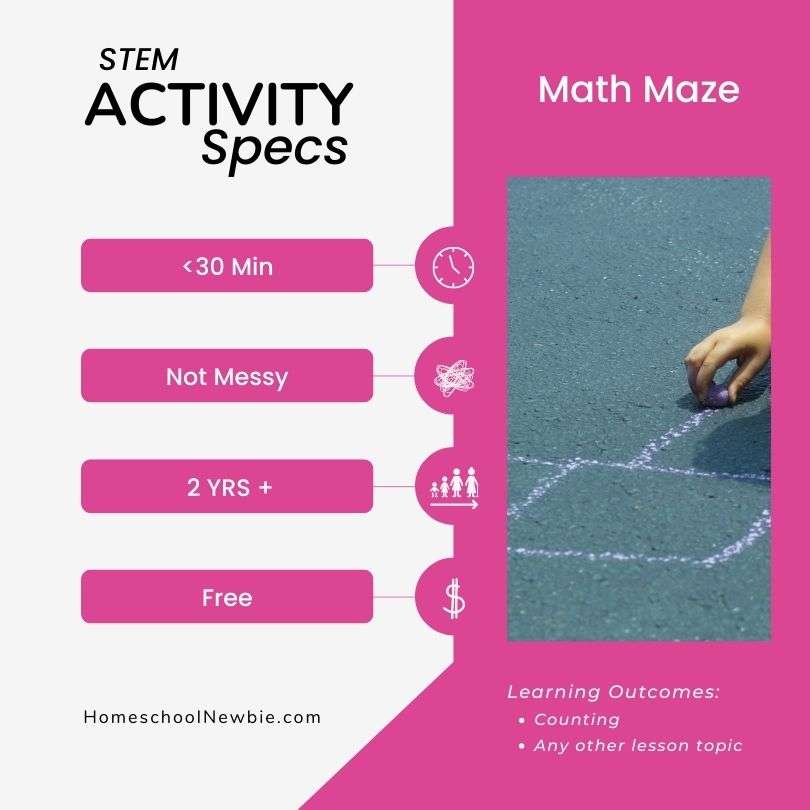
Learning Outcomes:
- Skip counting
- Adapt to other topics
Materials:
- Chalk
Directions:
- Draw a large square on the cement with chalk.
- You can draw a maze or a grid and then fill in numbers for counting on the inside.
- Draw an arrow for a starting point and one for an ending point on the outside of the maze.
- Invite your child to step on the numbers in the correct sequence. (1,2,3…)
Expert Tips:
- Try making the maze large enough to ride a scooter or bike through.
- You can draw a maze and solve a math problem or read sight words as they progress through the maze.
- Try this activity indoors with tape.
Learn more about this activity at handsonaswegrow.com
Learn About Money
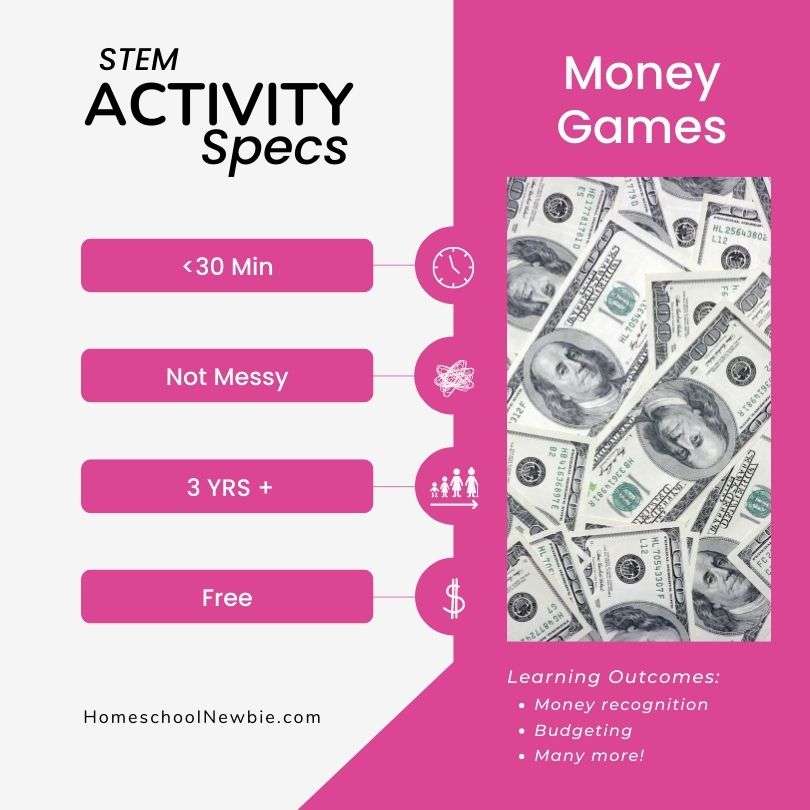
Learning Outcomes:
- Younger Kids
- Coin recognition
- Coin values
- Coin addition and subtraction
- Counting money
- Making change (from bills and coins)
- Understand how to make a simple store transaction
- Teens
- How to budget
- Awareness of everyday product costs
- Owning assets
- Saving money
Materials:
- Free game printable activity (see list below)
Directions:
There are so many free DIY games that teach about money skills. Here are some ideas to get you started…
For Younger Children
- Money trail board game
- Race to a dollar game
- Money war game
- Hungry caterpillar money games
- Carnival subtracting money game
- Free money games for k-2
- Money math games
For Older Children
- The price is right
- How to teach kids about budgeting
- Budgeting activity
- Teen budgeting game
- Jelly bean game
Expert Tips:
- Choose one of the money games above and play it as a family or class.
- Take it one step further, use the skills your child has learned in real life.
- Learn to spend and save their own money.
- Keeping track of where their own money is going.
- Donating money to charity.
Measuring Volume
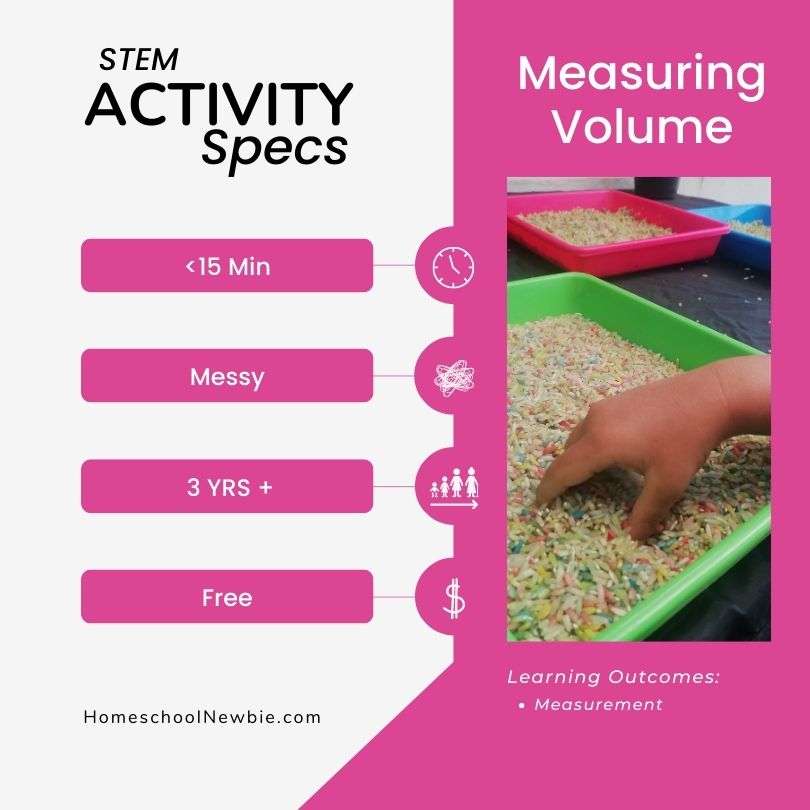
Learning Outcomes:
- Measurement
Materials:
- Dry rice or beans
- Measuring cups
- Plastic containers of different shapes and sizes
- Measuring spoons (optional)
- Large shallow container (optional)
Directions:
- Set out containers of a variety of shapes.
- Ask your child what container would hold the most rice.
- Fill the containers to see if their predictions were correct.
- Repeat using other containers.
Expert Tips:
- Try learning fractions using measuring cups.
- Fill the containers with other items such as colored water, flour, or sand.
- Use other units of measurement. (Ex: quarts, gallons)
- Weigh the rice.
Try more variations of this activity at Theresjustonemommy.com
Bake and Measure Challenge
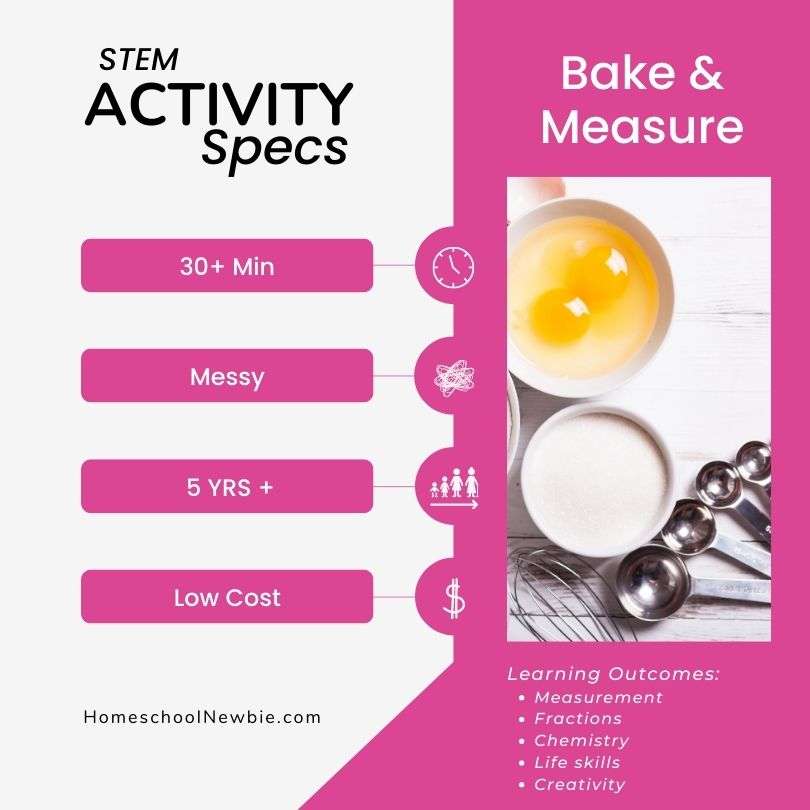
Learning Outcomes:
- Measurement
- Fractions
- Chemistry
- Life skills
- Creativity
- Problem-solving
Materials:
- Recipe
- Ingredients
- Kitchen measuring tools
Directions:
- Younger Children:
- With help, learn fractions while following a recipe of their choice.
- Older Children:
- Challenge your child to double a recipe of their choice.
Expert Tips:
- Try using visual recipes for younger or special needs children.
- Here is a list of free baking with fractions activities.
Recipe Ideas to get you started:
Learn more about this activity at homeschoolacademy.com
More Math Activities:
- Free math project-based learning activities
- Array multiplication game
- Algebraic equations with nature as variables
- Learn surface area with moving 3D shapes
- Free math escape rooms
- Sticks and right angles
- Math outdoors
- LEGO movie area and perimeter
- Count with eye dropper fun
- Blow dart math
- Great graphing race
- Skip counting puzzles
- 3D shape fun
- Tell time with a pizza pan or playdough
- Peekaboo math game
- Groundhog day probability
- Perler bead tangrams
What’s Next?
My son and I had a ton of fun finding and testing these simple STEM activities and I know you will too.
Of course, you’ll want to continue the fun at home.
Grab your own copy of our free eBook with easy science activities for preschoolers inside.
Read Next: Do you have an eager preschooler at home like I do? Check out this exciting list of 21 easy science activities for preschoolers!
Table of Contents

Hi, I’m Courtney! I’m the founder of homeschoolnewbie.com. I’m a former elementary school teacher turned homeschool mama who has a passion for home education! I have 10+ years of experience working with children in all kinds of educational settings. As a new homeschooling parent, my mission is to navigate the world of homeschooling and share with you the best home education practices. If you want to learn more about me, check out my about page. See you there!